
This is a very simple technique that you can do perfectly, or not so perfectly. If you have been afraid to sew because of being afraid to make mistakes...this is a PERFECT beginner project!!
So here is what I did: Gathered supplies needed:
1. fusible interfacing
2. solid colored t shirt (handmade OR store bought) ;)
3. sharp...did I say sharp scissors
4. sewing machine and thread
5. seam ripper (just in case)...just saying! ;)
Decide what you want to applique, for your first project, maybe start off with something simple that has a simple shape, like a flower or a heart. For my tutorial, I have decided to make a Transformer's shirt for my son.
Decide what you want to applique, for your first project, maybe start off with something simple that has a simple shape, like a flower or a heart. For my tutorial, I have decided to make a Transformer's shirt for my son.
I cut a piece of the interfacing a tad bit larger than my design and ironed it onto the wrong side of my fabic. I then found the Transformer autobot (VERY important to differentiate that) logo :) I started to draw it on the interfacing. Again, if you think your artistic skills are a bit short of Rembrandt...so are mine. This project is forgiving.
Ok the fun step....I turned the shirt inside out, I pinned the fabric with the interfacing facing me and started to sew a straight stitch around the perimeter.
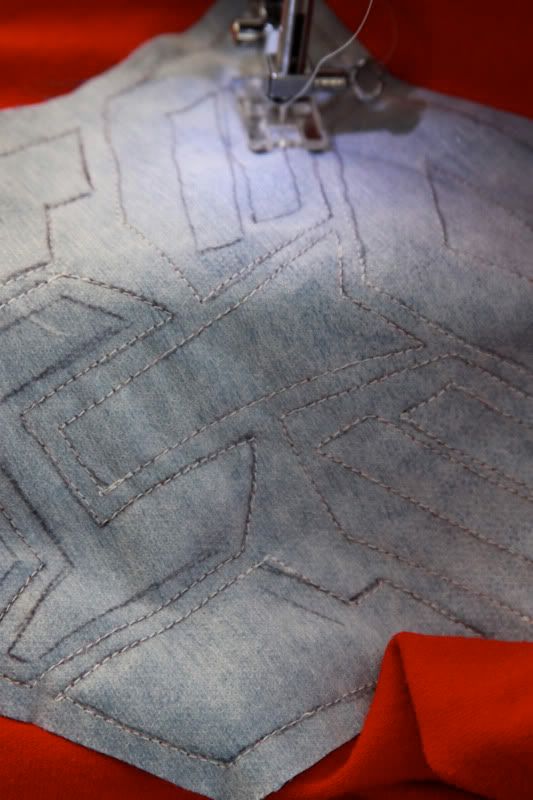
MAKE VERY VERY sure that as you are tracing your lines, you do not get the bottom of the shirt caught underneath the needle, sew it together as one piece and then pull your hair out in frustration...just saying ;)
Another **Tip** is that I back stitched at the beginning and end of each line (look at the pic below and you can see where the stitching is a little darker at the edges)
Once you have finished your stitching, turn your shirt back to the right side, and it should look something like this:

As you can see, it is not perfect, but with this type of applique, that is ok, almost better. Also I only stitched around once.
Now take out you sharpest scissors (also the smaller the better when trying to get into small spaces) Clip away at the areas that YOU want to see the under lying fabric come through on the design.

clip clip clip away....until you are happy with your design! (also keep in mind that once you wash it, the knit fabric will curl a little)
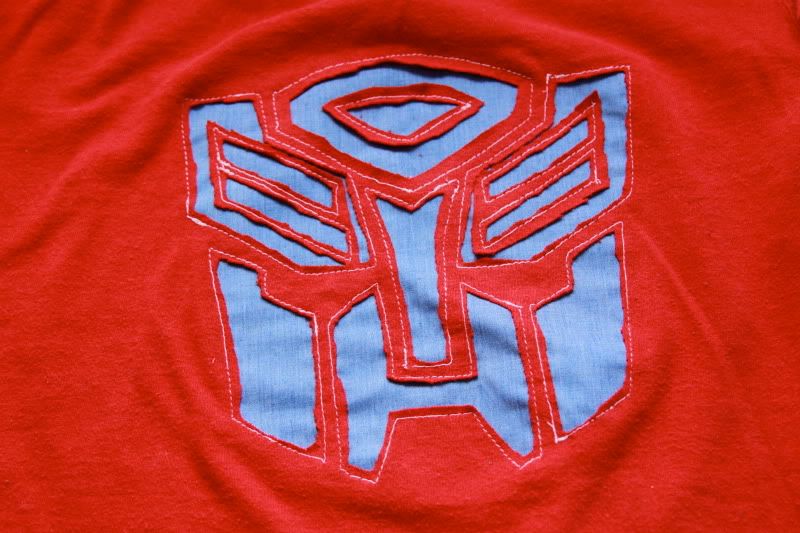
Here's mine:
Cute...hugh?
Hugs and Blessings!
Ingrid




 Posts
Posts


